Booking a journey
Booking a journey
To start booking a journey, log in to your account at https://business.trainsplit.com and head to the homepage.
Search for a journey
To search for a journey, head to the homepage and enter your departure and destination locations, along with desired travel times. If you have a railcard, make sure to specify it here.
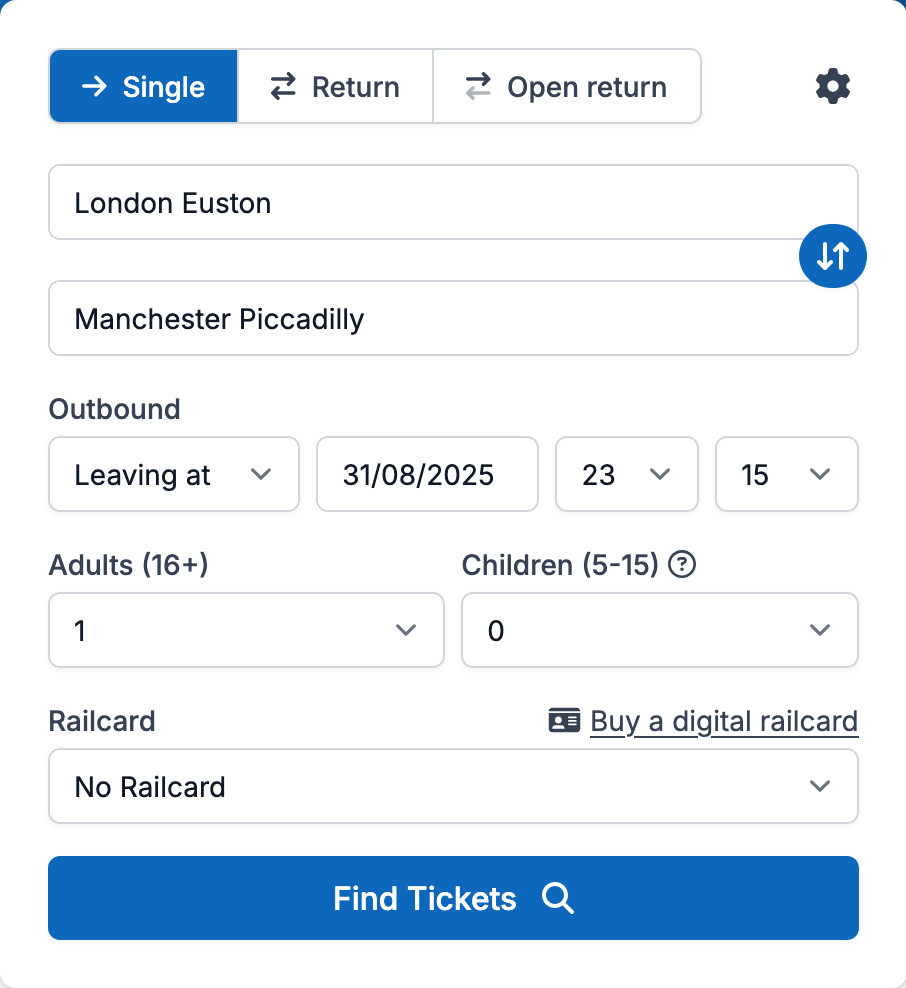
Heads up!
If you specify a railcard in your search, every passenger must have this railcard. If this is not the case, complete separate searches which you can add to the same basket.
Click on "Find Tickets" to start a search.
Select a journey
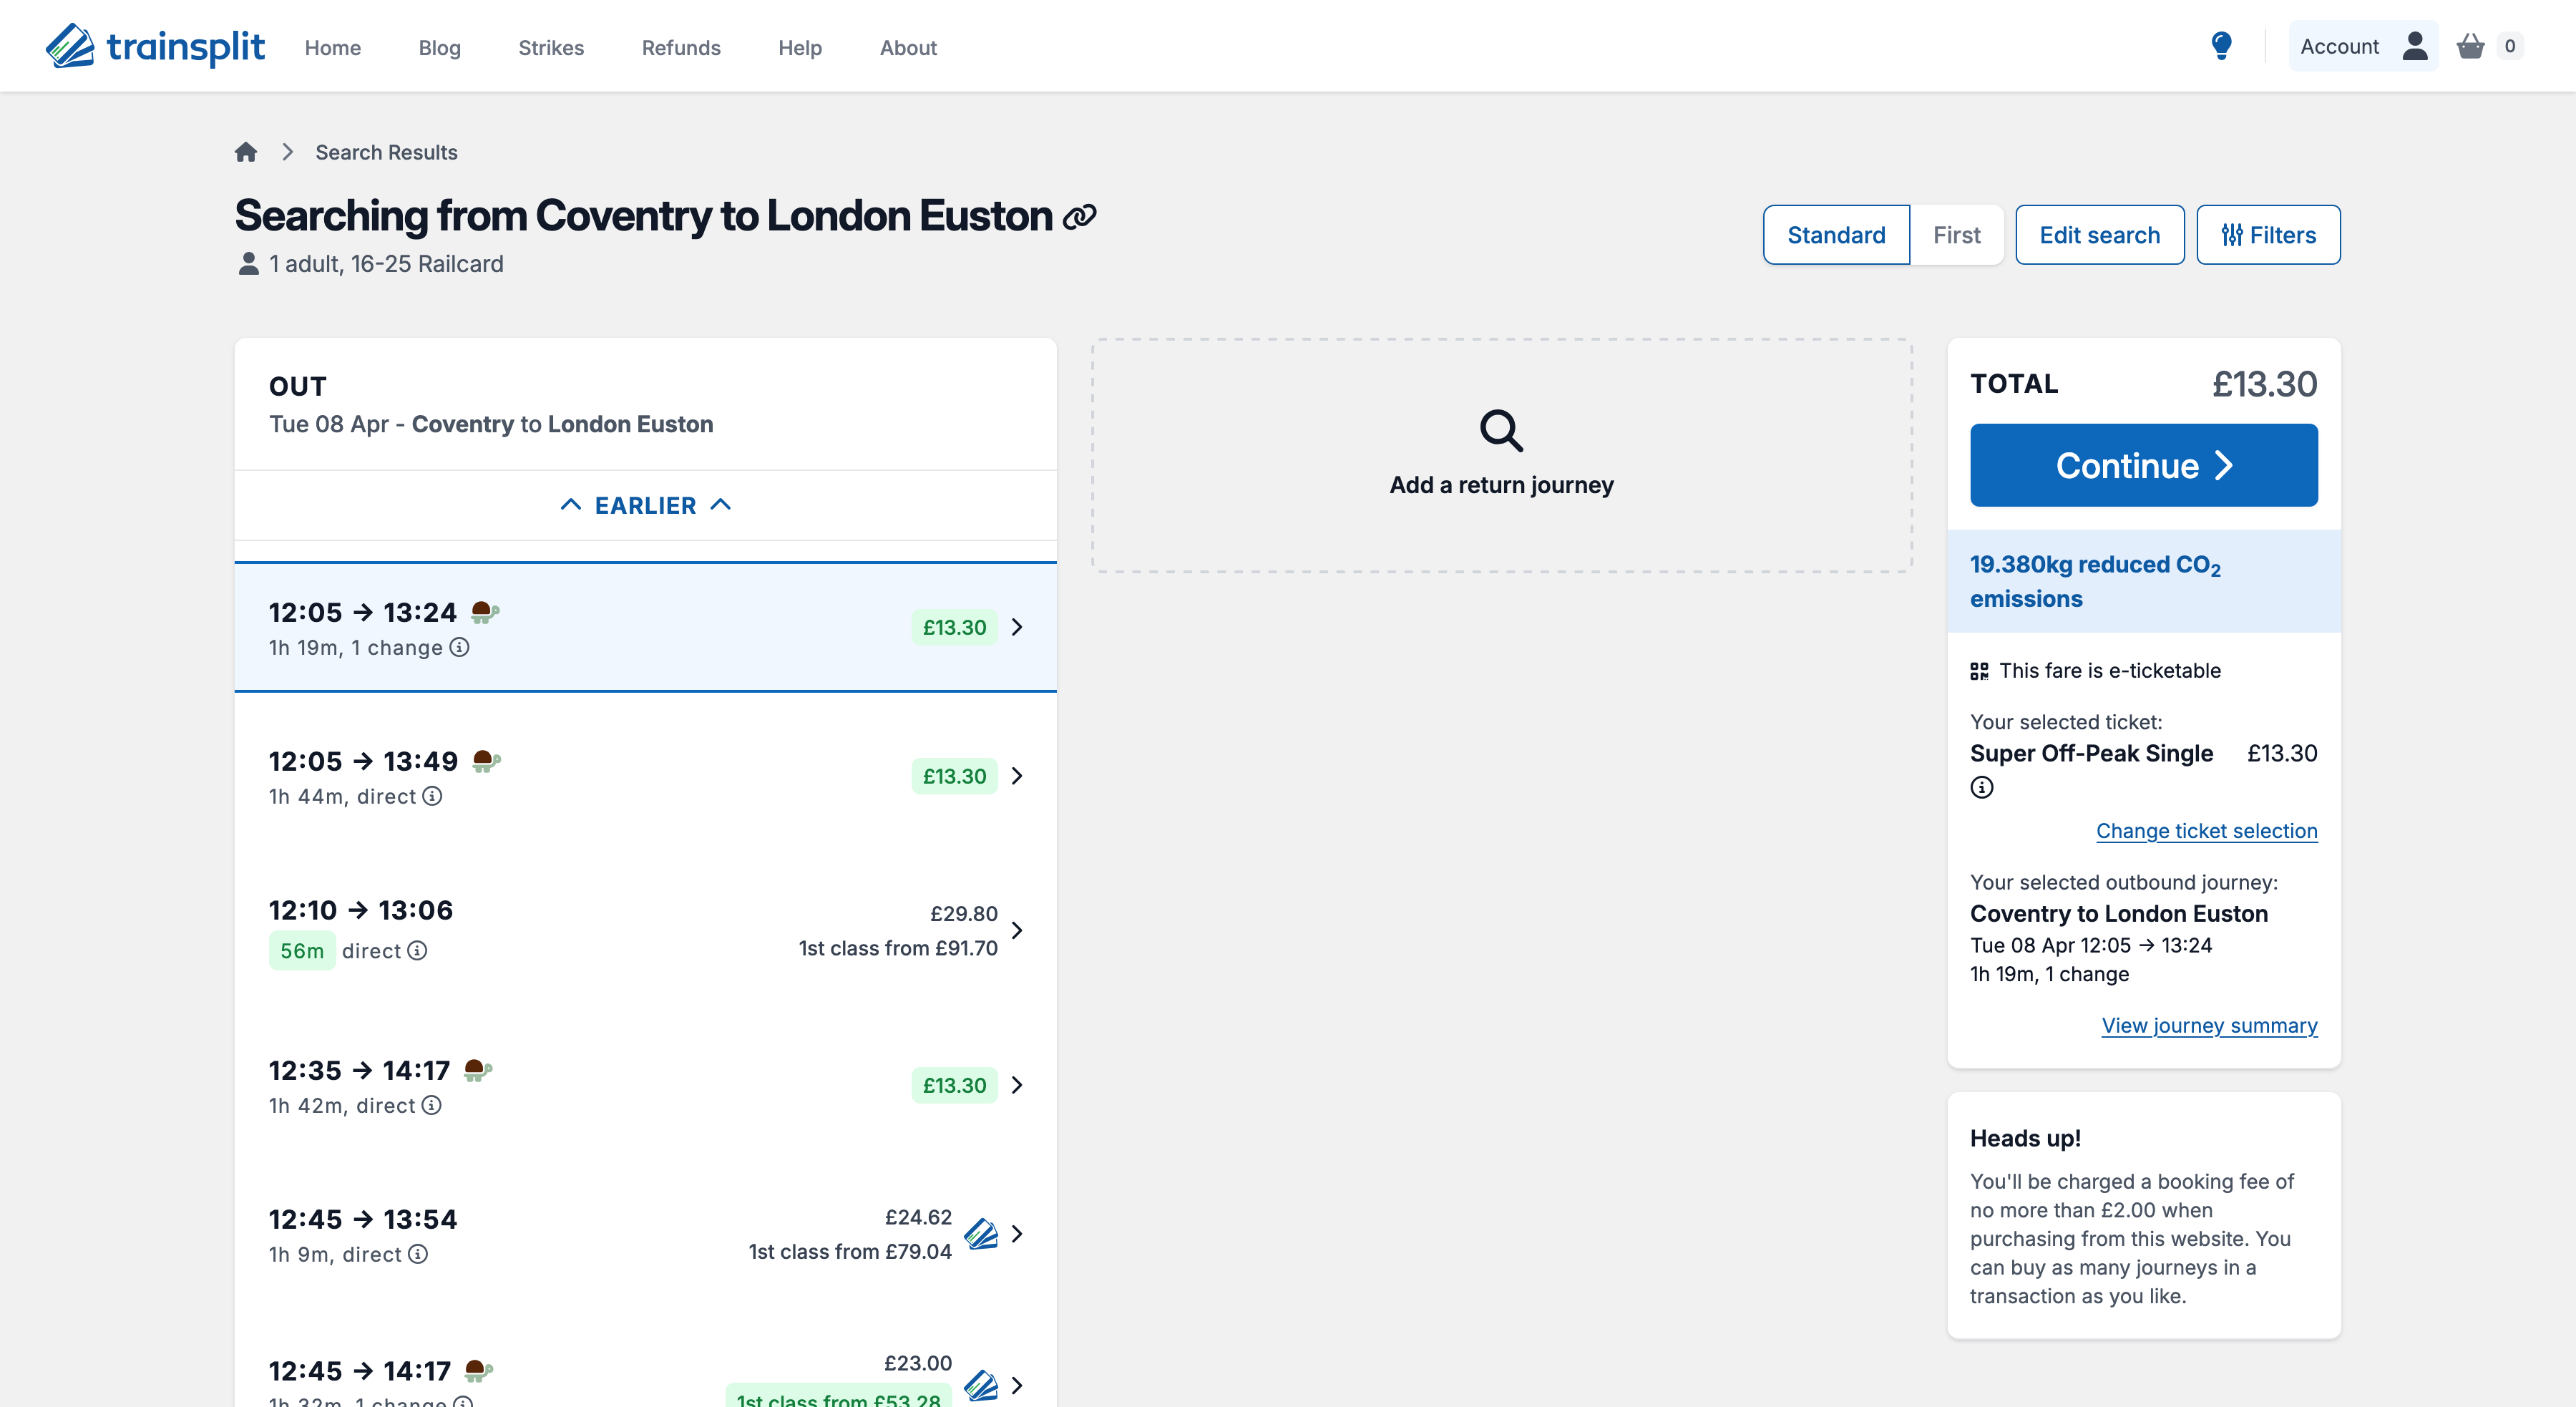
Once the search has completed, you'll be presented with a list of available journeys. You can filter these journeys by time, price, and number of changes.
Outbound journeys will display on the left-hand side of the screen, with return journeys (if searching for a return) in the middle.
If you want to look for journeys that depart earlier or later than the current selection, use the "Earlier" and "Later" buttons in each column.
If you need to edit your search, click on the "Edit search" button in the top right corner of the screen. This will show you the journey planner, where you can make any changes.
The right-hand side of the screen will show a summary of your selected journey and its associated cost. If you want to view the selected itinerary, click on "View journey summary".
Select ticket options and seat preferences
Once you have selected a journey, you will be shown details of the tickets you are being offered, along with the option to request seat reservations if they are available for part or all of your journey.
If seat reservations are not normally available on any leg of your journey, we'll display a message to tell you that you may not receive reservations. Some journeys require us to request seat reservations.
You can either be automatically allocated a seat by specifying any preferences you have, or you can select your own seats using our own SeatSelector.
Purchase your ticket
By default, you will normally be offered your tickets to be fulfilled via E-Ticket, meaning your ticket is available on your phone and you don't need to collect it at a station. Sometimes, however, we can only offer paper tickets that require collecting at a station. We will tell you if this is the case.
If your business has set up any custom questions or reporting fields, please fill in these fields before purchasing.
If your business is configured to pay by own card, you will now be prompted to enter your card details alongside your personal details. If your business has configured a stored card or other payment terms, you will only be presented with options to complete your personal details.
By default, we will send your confirmation email (and E-Tickets if applicable) to the email address associated with your user account. If you are booking on behalf of someone else, you are able to specify an additional email address at this point.
Confirmation
Once you have entered your details and completed your payment (where applicable), you will be shown a confirmation screen with your booking reference, journey details, and links to download your E-Tickets (if applicable).
You will also receive a confirmation email with your booking details. If you were offered E-Tickets, you will also receive these in a separate email. If you provided an additional email address at the time of booking, both yourself and the additional email address will receive these emails.
If you need to download a receipt for your booking, you can do this by clicking on the "Download receipt" button on this screen, or by following the link in your confirmation email.